How to prepare images for the web

Introduction
It’s important to understand that no matter how well-written the content on your website is, how useful the information is and how well it has been Search Engine Optimised (SEO), having poor images will make all that effort pointless.
Your website is an important part of marketing you and your business. It’s often the first thing potential clients or customers see. Having terrible images will not portray your business in the kind of light that will attract people to want to know more about you. We live in a world, particularly for the web, where aesthetics are important.
Having well-thought-out, relevant and high-quality images will not only complement and reinforce your other content, they will also give your visitors the confidence that you are providing a superior service or product. If the images are properly prepared, they will help with SEO and accessibility, plus ensure your pages load quickly.
Just to be absolutely clear, DO NOT USE POOR QUALITY IMAGES!! They will seriously undermine everything else that you do on your website!
Understanding image formats
There are a vast array of file formats available for images, many of which are suitable for specific purposes. Although you can use a number of these on your site, in truth there are generally only two that you will need to make a responsive and visually pleasing site. These are JPEG (.jpg) and PNG (.png)
Most photographs should be saved as JPEG files. They have millions of colors and are best suited to photographic images. They are also fairly small in size compared to some photographic formats that have a lot more functionality. So as a general rule of thumb, if it’s a photograph then a JPEG file is the format to use.
The second file format is PNG. This is much more common for graphic elements such as logos and icons. The other advantage that PNG has over JPEG is that it supports transparency, meaning you can have an image without a background. If you are in a situation where you want a photograph of something for your site without a background, then a PNG of that image would be appropriate.
However, PNG files are larger than JPEG files so it’s important to carefully consider if this is the right format for each image. If it doesn’t need to be a PNG then use a JPEG.
Sizing your images correctly
Why size matters
The size of your images can significantly affect the speed at which your site, and pages, load when someone visits. If the images are very large, as you might expect, they will take a long time to load.
The speed at which your site loads can have a marked difference to something referred to as the website “bounce rate”. This is a marketing term that is used to describe the percentage of visitors who land on a website but then leave, without viewing any other pages or clicking any links. So, if your images are slowing down your page loading times, the chances are your visitors will simply leave. We have become increasingly intolerant of waiting for information to reach us on the web.
Setting the optimal dimensions
So now that we understand the importance of size for our images, what are the optimal dimensions to give the best visual experience without having to suffer slow load times?
Most of the photo images on your site are likely to fall into two categories; banner images or on-page images.
Firstly, it's important to make sure that banner images are landscape images rather than portrait, as this can affect the final quality. Banner images should be no wider than 2000px (pixels). The height of the images is not so important because it should always be less than the height as it should be a landscape-orientated image.
On-page images can be either landscape or portrait-orientated, depending on what you are looking for in the design of the page. Of course, you may also choose to crop them into squares, but regardless of the shape, on-page images should be no more than 1200px (pixels) on the longest side.
Remember, for both banner and on-page images, the dimensions above are maximum. If the quality of the original image is good enough, they could well be smaller.

File size
The next part of sizing images has to do with the actual file size and not just the physical dimensions.
ANY IMAGE ON YOUR SITE SHOULD BE NO MORE THAN 500KB
If the file size is less than this after you’ve set the physical dimensions, then this is a good thing. In general, the smaller the file size, the faster it will load.
Optimizing Images for Web Performance
Now that we have discussed the dimensional size and file size of images that we should be using, the next question is; “How do we do that?” “What software do I need?”.
The good news is that you probably already have the software on your computer so there is no need to pay a fortune or a subscription for yet another app. There are also websites that will help to get the file size down without compromising the quality.
Image Editing Tools
If you’re on a Mac, the Preview app will allow you to crop, adjust the width, height, name and file format for your images:

If you’re on a Pc, the Photos app will also allow you to crop, adjust the width, height, name and file format for your images:

As a rule of thumb, reducing the dimensions of the image will also reduce the file size. Keep an eye on this as you change the dimensions because you may not need to do anything else to the image.
If you find that you want to make more fundamental changes then both of these apps will allow a certain amount of editing (brightness, contrast, saturation etc), so there's a good chance you can get the look and feel you want without having to splurge on Photoshop. Additionally, Canva and even Squarespace have the ability to carry out editing of your images.
compression Tools
Every now and then you will have an image that, despite being correctly resized dimensionally, is still over 500mb. Thankfully there are some websites that will compress your files so that the size is lower and do it without the quality being compromised.
There are many of these available, but I’ve had some good results from these:
Ensuring image consistency
One of the easy mistakes to make with images is to look at them in isolation. You have a style and feel to your site. You’ve chosen a color theme and it’s important that your images complement what you’ve created so far and not fight it. Try to find images that tell the story you want to get across, but also work with your color palette. It’s equally important that these images are consistent with each other to help maintain the style of your site.
One way to do this is to use stock images that come from the same photographer. Often they will have a batch of images that were taken as part of a theme. Another top tip is to make templates in something live Canva for situations where you have images being used in similar situations, such as blog posts.
The look of the image is not the only element of consistency. If you have multiple images in the same section, or on the same page, it’s helpful to ensure they have a consistent size and orientation. For example, a gallery might look more visually appealing if all the images are square and the same size.
These small changes can give your site a look of professionalism. They have been carefully thought out and not just dumped on a page.
Sourcing Images
We’ve covered much of the preparation of your images, but what if you don’t have any? Let’s discuss the options and their pros and cons.
Take Them Yourself
While this is an extremely cost-effective way to get images, I’m going to go full circle to the introduction at the start of this post, DO NOT USE POOR QUALITY IMAGES!!
Yes, there are some amazing cameras on our phones these days, that can take some incredible pictures. However, the best photos don’t rely on the camera alone. Professional photographers will use all sorts of equipment (lights, reflectors etc.) to create that perfect shot.
While a good picture is a good picture, I’d be careful about using images you’ve taken yourself wherever possible (unless you're a photographer, of course). Clearly, there may well be occasions where this is unavoidable, but I would keep them to the absolute minimum.
Download From The Web
Let me take a moment to explain something that is extremely important about taking images from the web. All images on the website are covered by copyright laws. This means that someone legally owns that image. If you save images from a Google search, or from a website you like, you run a real risk of being sued!!!
However, there are a large number of sites on the web that offer Stock Images. These are specifically made available for use by people such as yourself. Here the photographer will allow the use of their images for print or web under a license agreement, and often commercially, not just for personal use. The Stock Image site will have information as to how you can use each particular image.
Stock Images usually fall into two categories, paid and unpaid. The big hitters like Adobe and Shutterstock offer extremely high-quality images but for a price. If there is a particular image that you absolutely need to have, then a small investment is definitely worth it. Remember that if you're using it for the web, rather than for print, then you don’t need the highest resolution version which can save a lot of money.
Alternatively, there are more and more Stock Image sites that offer licensed images for free. Some excellent images can be found on these sites and they are definitely worth a little time to get a substitute for that expensive one you saw elsewhere. Some of the ones I particularly like are:
unsplash.com
pexels.com
stocksnap.io
Hire A Photographer
Clearly, this is the most expensive option, but under the right circumstances, it could easily be a great investment.
If you’re selling products, then having excellent shots of these items is essential. If you only have a few items then getting a professional photographer involved can really make a difference. If you have a lot of products there are companies that you can ship items to. They will photograph them for you and return them.
You may want to consider a photo shoot if you have the budget. This can be location-based, in multiple locations. If you have a website that showcases you and your products or services, this can really help you to stand out from the crowd.
Preparing images for SEO
All of the information on your website needs to be found before it’s of any use to anyone. Although the text is of paramount importance, your images are also very much part of the process. Making sure they are properly prepared for Google is equally valuable.
Why SEO Matters
Search Engine Optimisation (SEO) will trawl your entire site, including the images. Of course, it can’t actually see your images, so it's up to you to tell Google what the image is. If the image is of something that someone has searched for, Google will use that description to push your site toward them. If your images have no instructions for Google, it will ignore them.
We want all the help we can get to bring our potential clients and customers to our site.
Using Descriptive File Names
That file name gives us no information about the content of that image. To get the image SEO prepared, we will simply need to change its name. We want to describe what the photo is of so that Google can understand its content. In order to make this efficient we can keep the description to the point - just the basics. For example:
a-picture-of-a-girl-riding-a-bike-in-the-sunshine.jpg
This is descriptive, but overly so. To keep the basic information and no extra, this would be more suitable:
girl-riding-bike.jpg
The next part to consider is keywords. These are the actual words people are using in their searches. An example would be someone searching for:
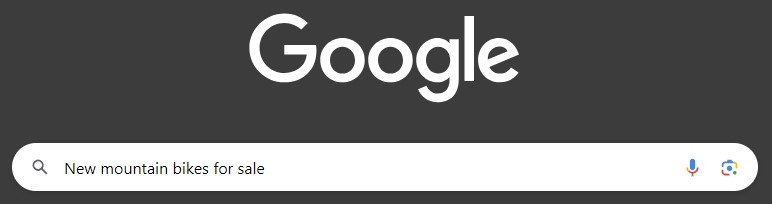
With this in mind, you might want to consider naming the image:
new-mountain-bike-girl.jpg
You may be wondering why I have put dashes between the words. This is a best practice as some operating systems struggle with spaces in file names. It’s only a small thing, but worth doing.
Alt text
What is Alt Text? This is a way of giving information to accessibility software, such as for people who are visually impaired, so that they get a full description of the image. Unlike the file name, this is a description as if you were telling someone what a picture was of, without showing them. Google likes images that have been prepared for accessibility, so its a double win.
SquareSpace, and indeed most website builders, will give you the option to add Alt Text to an image when you upload it. Taking the example above, the Alt Text for that image would be more along the lines of:
Girl riding new mountain bike in the sunshine
You will notice that the dashes are no longer required as it is simply a description and not a file.
Conclusion
Hopefully, you now understand a great deal more about the importance of images on your site. You know that how they are prepared can have a huge impact on the operation of your site, from how fast it loads, to how search engines will use them.
You also understand that the quality of images is of the utmost importance. Poor images will ruin all the hard work you have put into the rest of your site.
The way you size and name images will help to push your site to your potential clients and customers. The whole point of a website is to attract these people to your products and services.
Finally, you know that saving images from the web has copyright issues and can land you in some very hot water.
The right images, properly prepared, will give your website that polished and professional look your customers will be seeking.